
|
|
|
|
#1
 12-31-2006, 08:36 PM
|
||||
|
||||
|
This thread is meant to parallel the similar thread for the Saturn 1B, since both models use the same Apollo Capsule kit. It is not meant as a competitor to that thread, but as a complement since both models are of the same vintage and historical importance. While a great deal of time is spent working on the Apollo portion of the model, there are other aspects of the LJ-II that have similar requirements, such as the application of wraps and the built-up fins. What I want to try to do is document the construction using some techniques I found helpful, and any pitfalls I may run across, during the process.
__________________
Craig McGraw BARCLONE Rocketry -- http://barclone.rocketshoppe.com BARCLONE Blogsite -- http://barclone.wordpress.com BARCLONE Forum -- BARCLONE Forum BARs helping BARs SAM 0044 AMA 352635 
|
|
#2
12-31-2006, 09:55 PM
|
||||
|
||||
|
This first section begins where most models begin -- with the motor mount. The use of laser-cut components makes this process so much easier, and Carl is to be congratulated for the accuracy of these parts. I found them to slip together with just enough friction to keep them from excessively moving around while gluing, but not so much that I needed to sand the rings to make them fit over the motor tube.
The first image show the mount in partial profile, after initial fitting and glue-up:  Beginning with the assembly of these parts, I made a change from the instructions. I wanted a tighter fit of the rings over the engine hook, but without crushing the tube by trapping the hook under the ring. To get this fit, I sanded some shallow flat notches in both rings. The next image shows the tool I use to sand these notches: 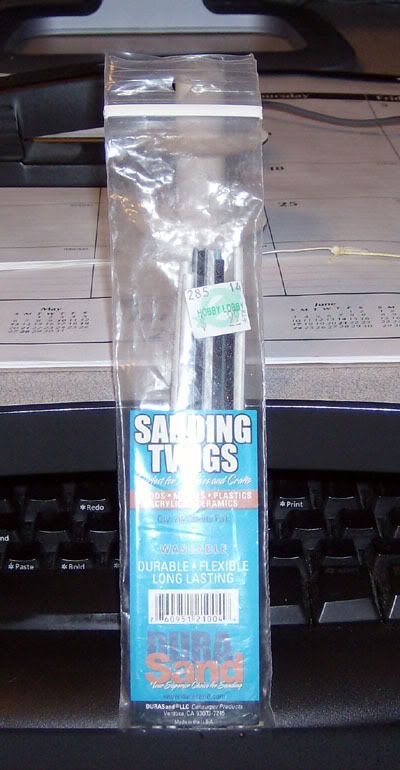 Using one of these twigs, the same width as the hook, I carefully sand a shallow flat notch in each of the rings, with the one in the normal lower ring directly opposite the pre-cut engine hook opening. This allows the rings to fit more snugly over the hook, holding it in position better. Next, the former lower ring will become the top ring:  What I am now able to do is tie the Kevlar thread around the motor tube, and run it through the larger slot:  I use these CA applicators to put the glue to the joints: 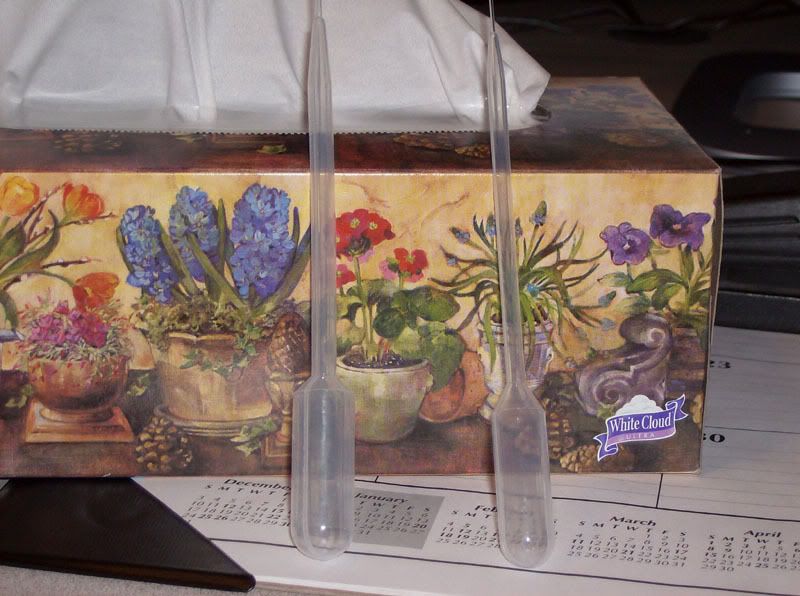 I am using Titebond II for this project, which is my glue of choice for building most models. The glue is applied thin -- about 50-50 with water -- and this allows the glue to wick into the joints and get deep into the "roots". When the first layer is dried, apply a second layer right over it and this will secure the parts without the typical waste of glue. It really doesn't take that much glue to work with these paper components. Once the glue dries, these parts are rock-solid. Now, I attached a snap swivel to the free end of the elastic chord:  Here is the snap swivel attached: 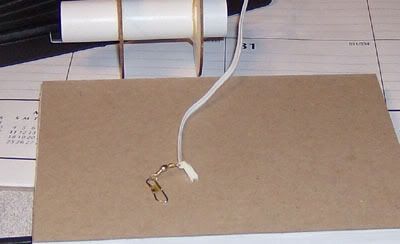 And now, the motor mount subassembly is complete, ready for insertion into the body tube:  This ends the first part of the project. Next message will deal with the fins.
__________________
Craig McGraw BARCLONE Rocketry -- http://barclone.rocketshoppe.com BARCLONE Blogsite -- http://barclone.wordpress.com BARCLONE Forum -- BARCLONE Forum BARs helping BARs SAM 0044 AMA 352635
|
|
#5
01-01-2007, 02:48 PM
|
||||
|
||||
|
Quote:
Uhhh, 'fraid so... Sorry. I'll have to get another one for bag shots... 
__________________
Craig McGraw BARCLONE Rocketry -- http://barclone.rocketshoppe.com BARCLONE Blogsite -- http://barclone.wordpress.com BARCLONE Forum -- BARCLONE Forum BARs helping BARs SAM 0044 AMA 352635
|
|
#6
01-01-2007, 05:37 PM
|
||||
|
||||
|
I guess I'm the only one who builds a house from the top down?????
I wish I had seen this before I started building!!! Seriously, You are truly skilled and experienced rocketeer. Your pictures and descriptions are worthy of a "How to build rockets" handbook. But I get sooooo excited I sometimes seal the cone, mount the fins and paint and decal, without even a mmt or recovery given a thought. On one occasion, I had to glue a centering ring down a rockets throat with shock cord on a year old build while prepping for the next day's launch. I must follow the directions next time! Bob
|
|
#7
01-01-2007, 04:38 PM
|
||||
|
||||
|
Quote:
I'm sure someone has an unbuilt kit.
__________________
"I'm a sandman. I've never killed anyone. I terminate runners when their time is up." Logan from "Logan's Run" http://sandmandecals.com/
|
 |
| Thread Tools | Search this Thread |
| Display Modes | |
|
|


 Hybrid Mode
