
|
|
#22
 09-10-2009, 06:13 PM
|
||||
|
||||
|
You answered your own question. That is correct. Balsa was a bit shy of the mark.
 Steve 
|
|
#23
09-10-2009, 08:34 PM
|
||||
|
||||
|
Molding the parts. I started with going over the masters and making sure everything was good to go. Next I sprayed a healthy coat of Crystal Clear Krylon over the masters. RTV silicones can be very unstable and after handling the parts to make them, any sweat that may have dropped on the surfaces or any sulfur base material will cause the silicone to fail. It does this by failure to set up on and leaving uncured surfaces. Most upsetting. So the Crystal Clear will seal the surface and guarantee and good properly cured surface. It acts as a barrier.
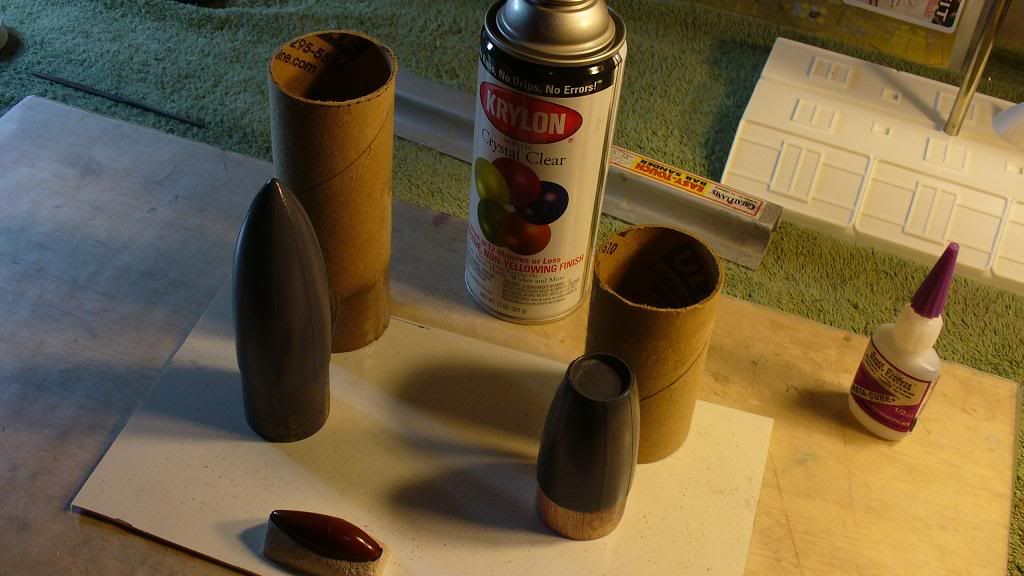 As you can see here the masters are mounted to a scrap piece of styrene and glued to the plastic with CA. I always keep the tubes people send me airplane and submarine plans in as they make great containers for pouring the RTV into. This this type of poured mold you simply glue the tubes to the mounting surface over the master with CA. Make a nice fillet of the CA at the bottom because if silicone can it will leak out of the tiniest hole it can find. No mold releases are needed with silicone as it only sticks to itself. In that case Vaseline is your release. 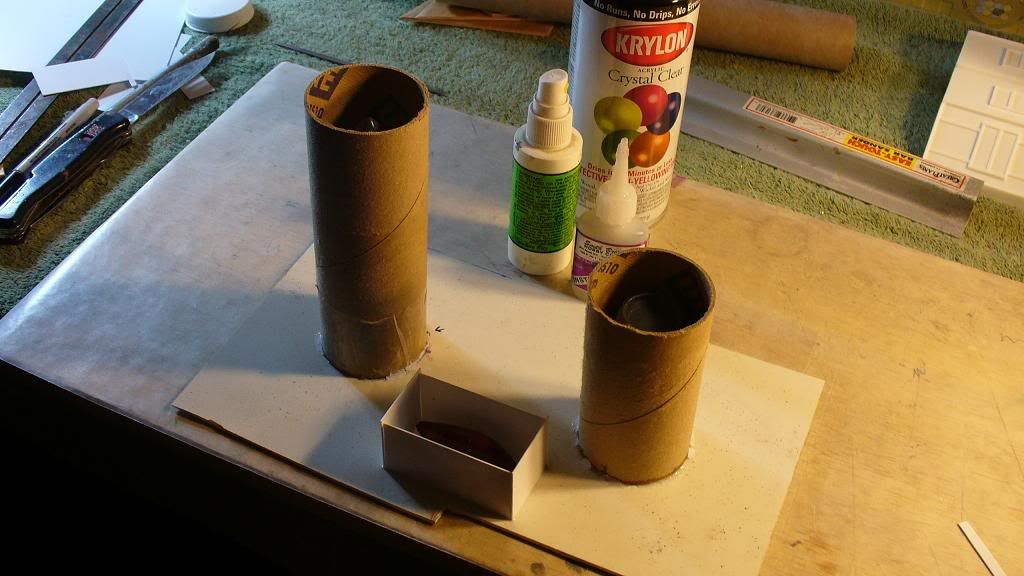 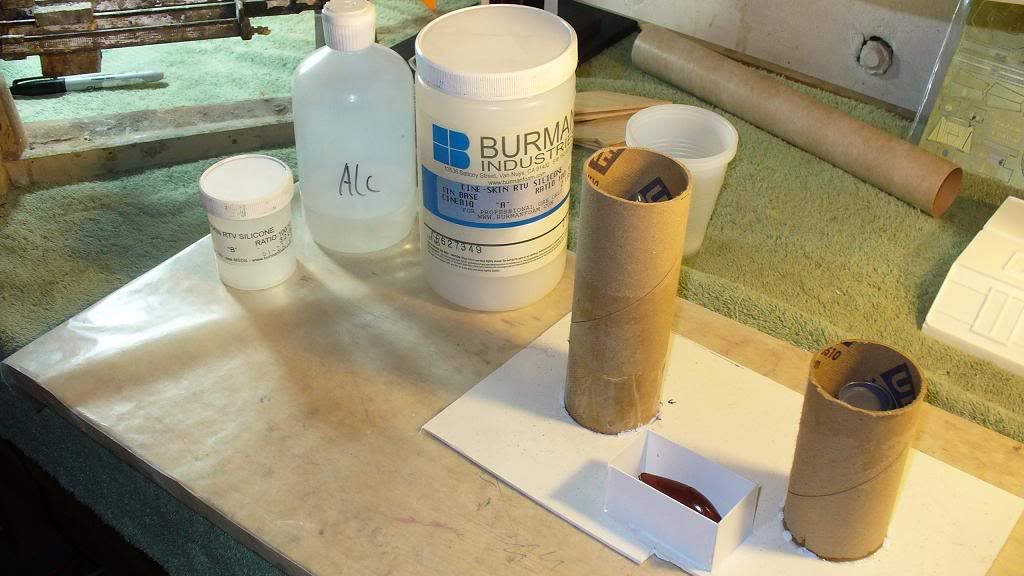 Since I was out of my usual GE 1000 RTV I used this thin based silicone I use to make prosthetics. This is used extensively these days over foam rubber for makeup effects but also is an excellent mold maker as well although a bit more expensive. I had it on hand so I used it. 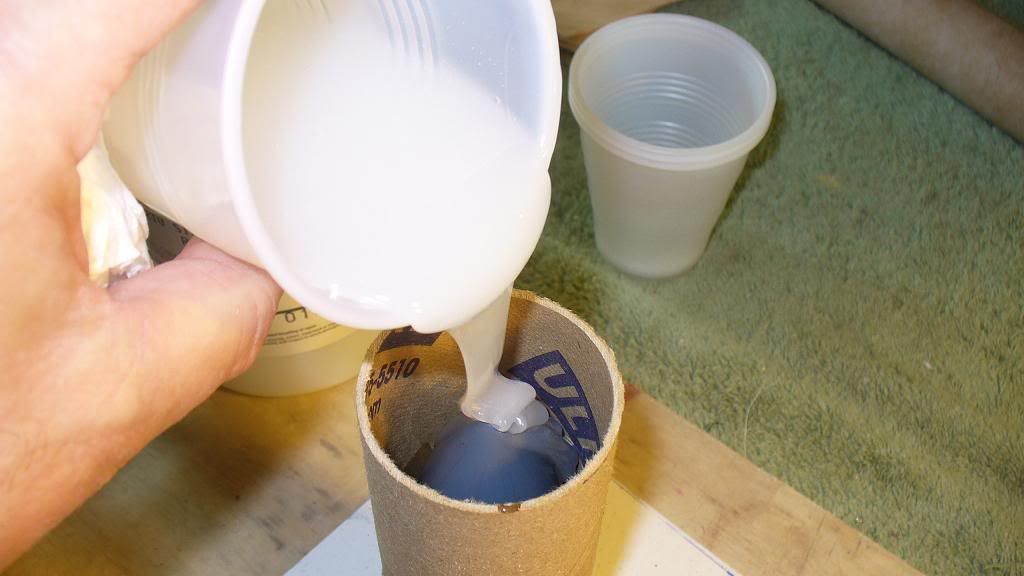 It mixes as two parts. The ratio is a simple one, 100 parts base to 10 parts catalyst, mix and pour. In a few hours it sets up. Let sit over night and you can make parts the next day. 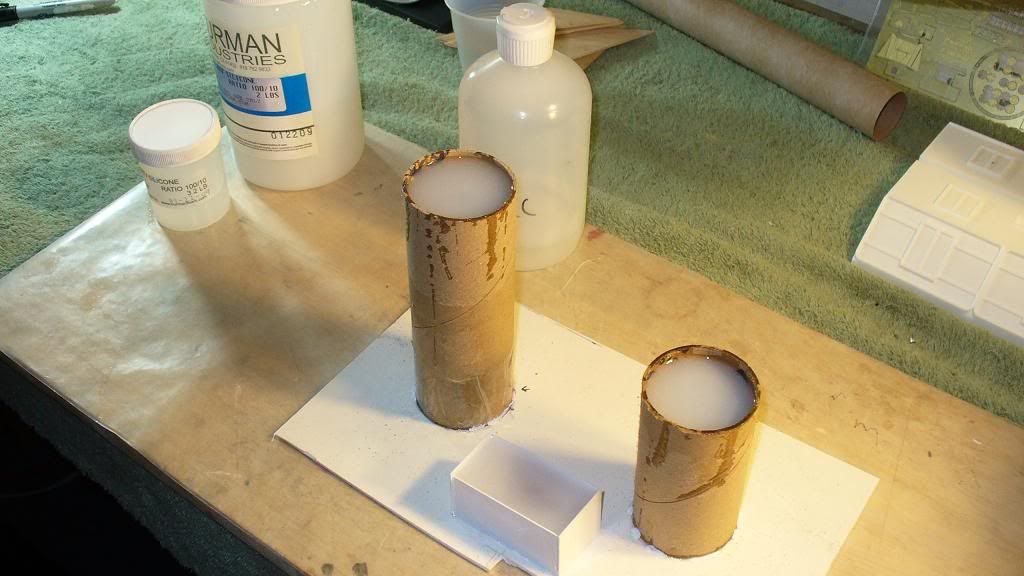 And her are the finished molds. Once I open them tomorrow I'll keep the tubes as mother molds. Silicone is very flexible and if it's not poured thick it will distort. More tomorrow. I'll show you how easy it is to slosh pour Alumilite and get an even and hollow part. I've done this a bunch with my Submarine sails and tank turrets and it works great saving you the working of making a core. Lighter too. Steve
|
|
#24
09-10-2009, 08:36 PM
|
||||
|
||||
|
Forgot to mention the alcohol is used for clean up. Nothing cuts silicone better than good old rubbing alcohol. And the white material around the canopy master is sheet styrene.
Steve
|
|
#25
09-10-2009, 09:11 PM
|
||||
|
||||
|
Very cool stuff Steve! I can't wait to see how the mold opening and Alumilite pour are done tomorrow.
 I'm starting to compile a list of must try products including glazing spot putty, Chartpack graphic tape, RTV and Alumilite.
|
|
#26
09-10-2009, 11:16 PM
|
||||
|
||||
|
Cas2047 go for it.
Steve
|
|
#28
09-11-2009, 01:54 PM
|
||||
|
||||
|
Thanks Sandy, that's nice of you to say!
steve
|
|
#30
09-11-2009, 04:03 PM
|
||||
|
||||
|
Thank you wilsotr. I'm glad it helps.
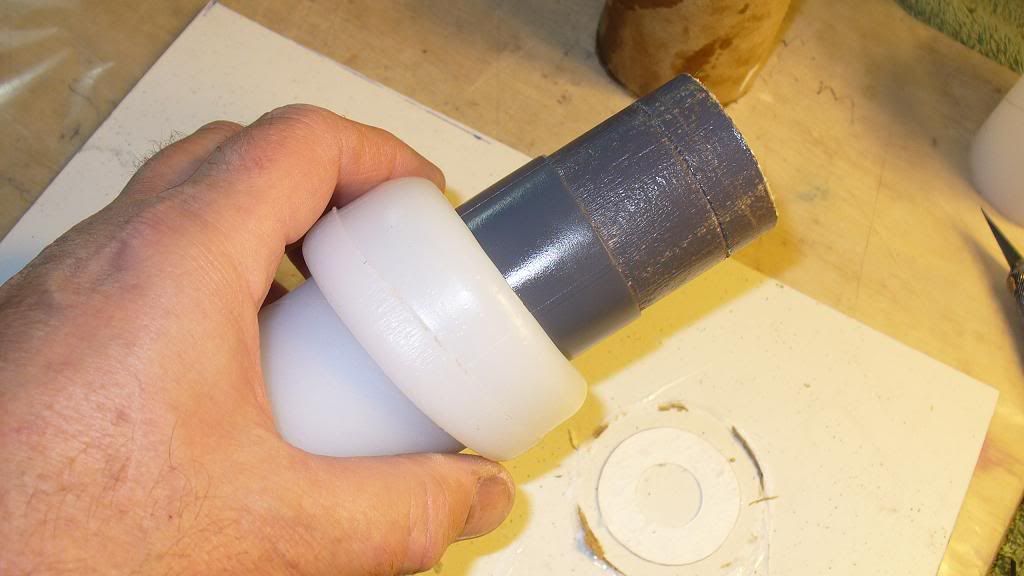 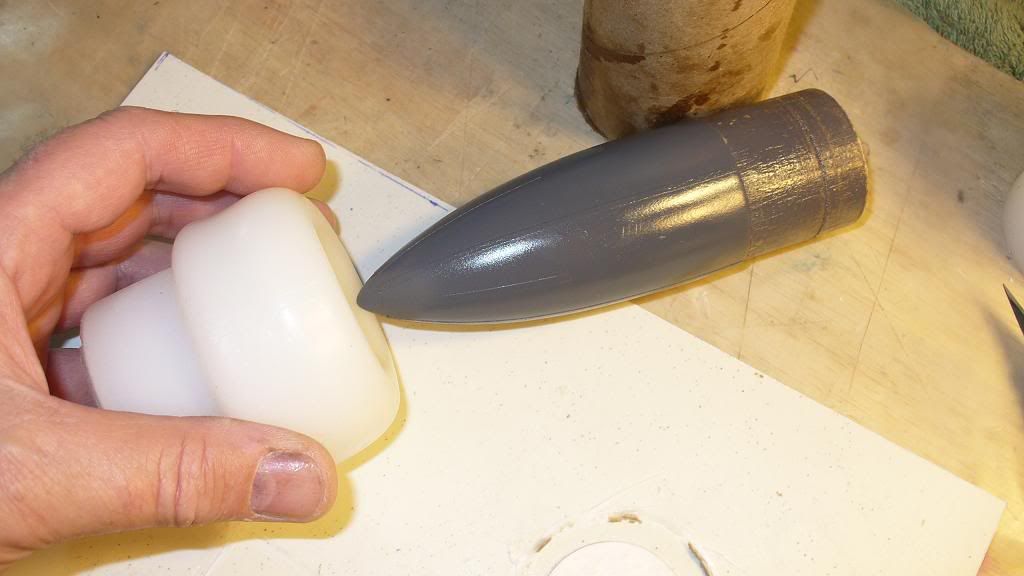 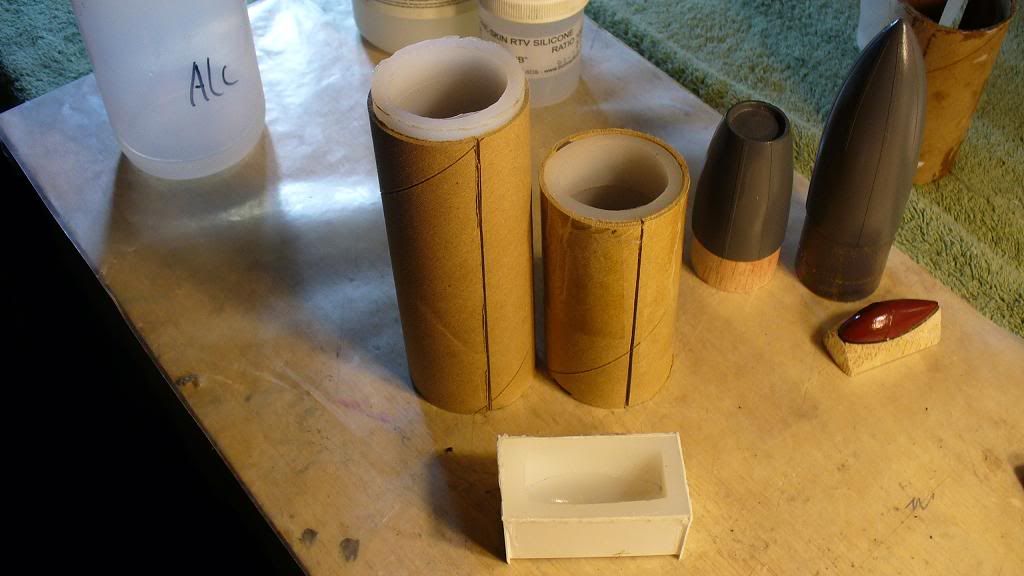 I demolded the masters this morning. I simply cut the tubes and and dropped out the silicone. Then I rolled it back off the masters and put them back in the tubes. They came out nicely. This silicone is so thin it traps few bubbles so I didn't have to use a vacuum camber or pressure pot. 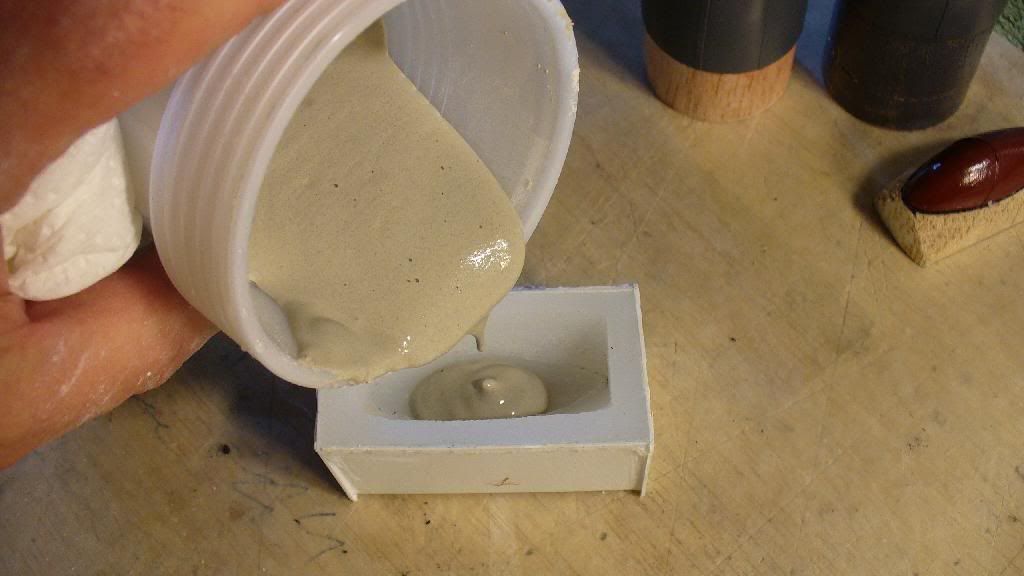 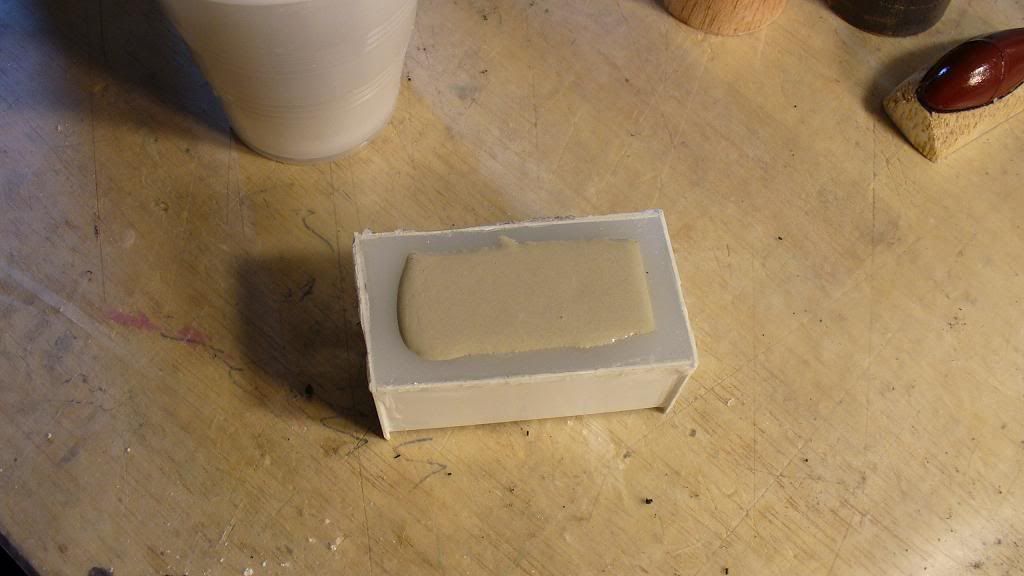 Next thing I did was to first pour a stone buck in the canopy mold for vacuum forming. I use UltraCal 30 and very hard plaster like material used for making prosthetic molds. Dental stone is good too. Once this sets up hard as a rock I can then vacuum form over it. And you can make as many as you need from the mold. 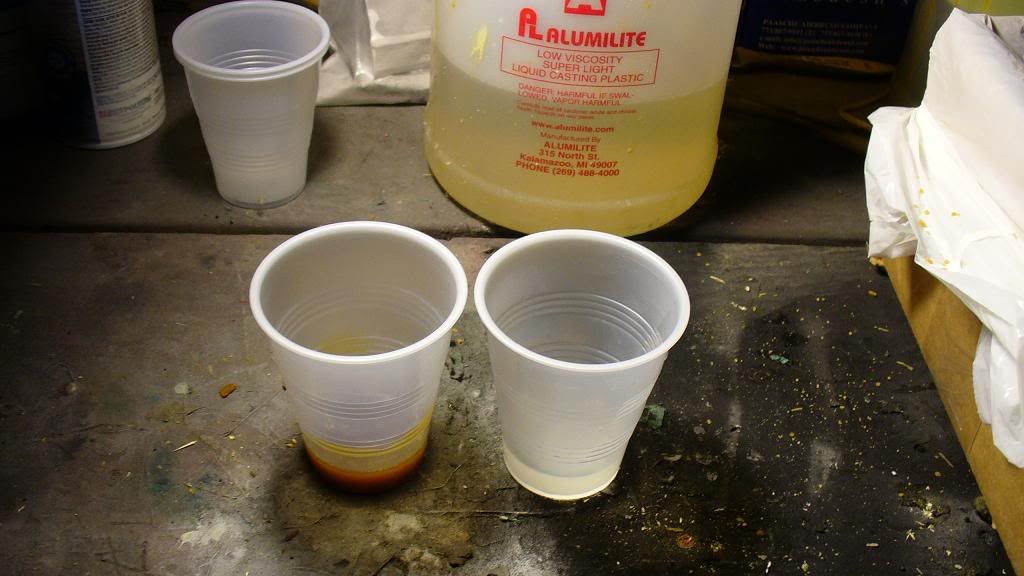 Out to the dirty garage in the blistering heat here to use the two part Alumilite to cast the parts from the molds of the tail cone and nose cone. This is the easy past really. Just mix two even proportions of the two parts and stir together well for a few seconds until it turns clear amber and pour into your mold. You'll have a minute or so to work with it. First roll it around getting and even coating over the entire surface of the mold. Then keep rolling it until you see it just start to thicken and turn on end and drain. It might take a bit of practice but you'll get it and it works so well as you will see. I do at least two coats of Alumilte. Each time it gets a bit thicker and stronger.  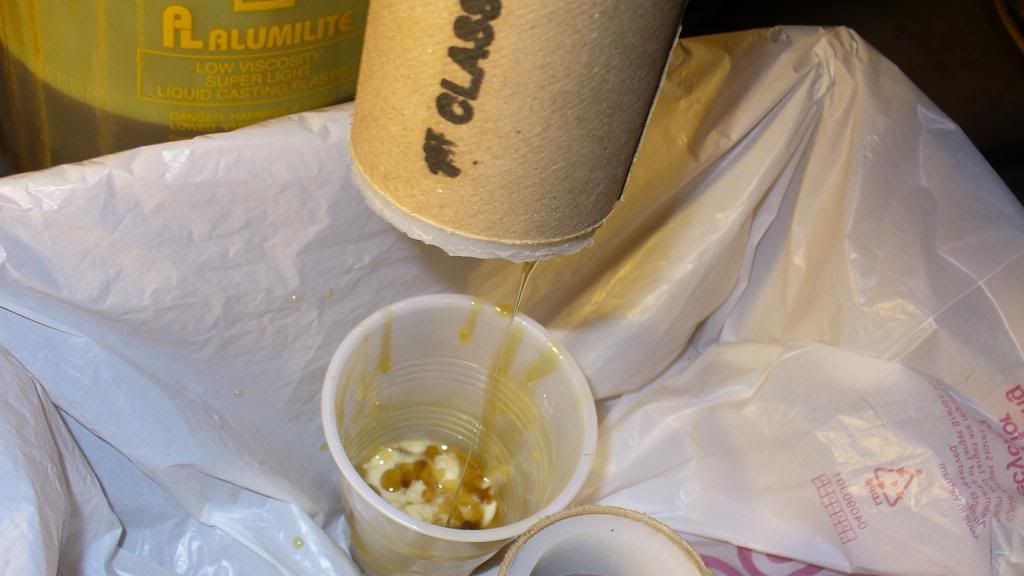 Last edited by U812 : 09-11-2009 at 11:51 PM.
|
 |
| Thread Tools | Search this Thread |
| Display Modes | |
|
|


 Linear Mode

